Here’s a short guide on how to get started with the Tanium Server SOAP API. This continues some of the discussion from the Integrations Through the Tanium Server API article and walks you through a quick way to immediately start playing with the Tanium Server API. Keep in mind that this doesn’t use the Pytan Python Wrapper project and instead (for better or most likely worse) focuses on the raw SOAP API.
To follow along, you will need:
A functional Tanium Server and user login.
The console.wsdl file out of the Tanium Server’s installation directory.
the Chrome browser on a Mac or Windows machine – when I’ve documented how to get started with the SOAP API in the past, I’ve always relied on a product called SOAP UI. But, I’ve got a Mac and the performance is terrible, so I decided to look for a new tool. And really, we don’t need much… just something that can send SOAP requests easily and see the response.
Another thing to keep in mind is, this quickstart should be used prior to any sort of actual API integration work. If you don’t understand what is happening at a basic level here, then you’re setting yourself up for failure when you move on to actual integration programming/scripting.
SETUP
First, open up Chrome and Google for “boomerang soap”. Boomerang is a fairly simple and straightforward Chrome extension/app that does exactly what we need: send and receive SOAP requests (and REST, which will come in handy for future quickstart articles). Best of all, it doesn’t hang my CPU.
After setting up, your Boomerang setup process should look like this:
Step 1: Create a new project
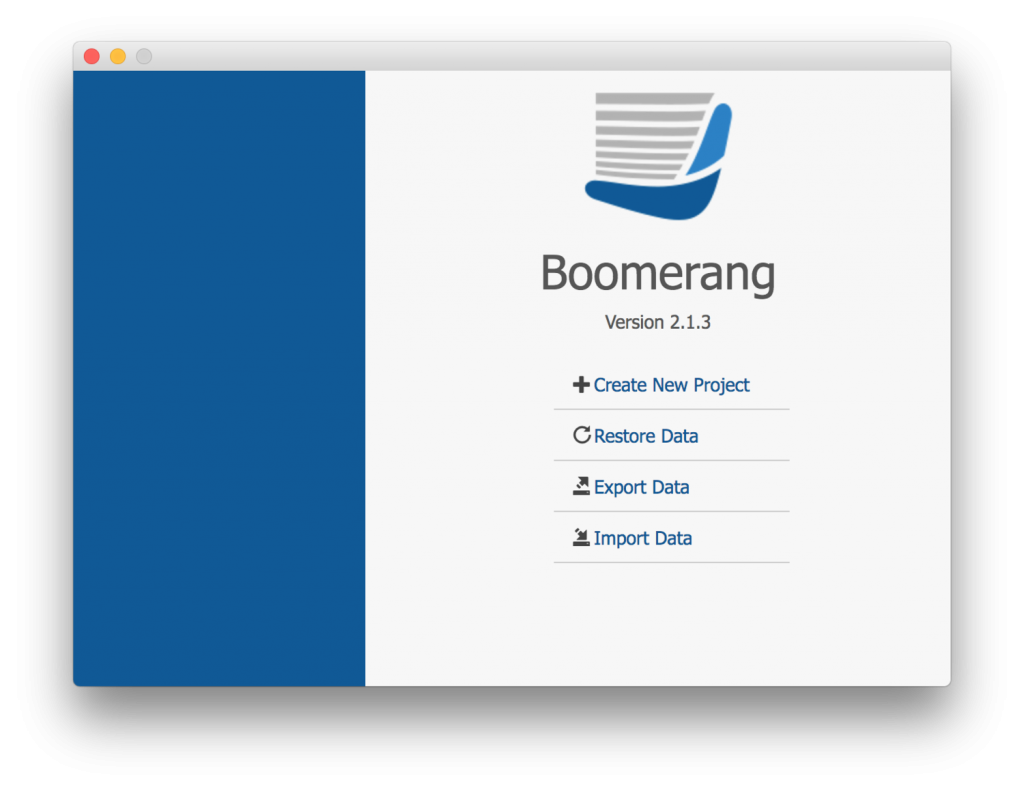
Step 1: Create a new project
Step 2: Add the local location of the console.wsdl file and give the service a name
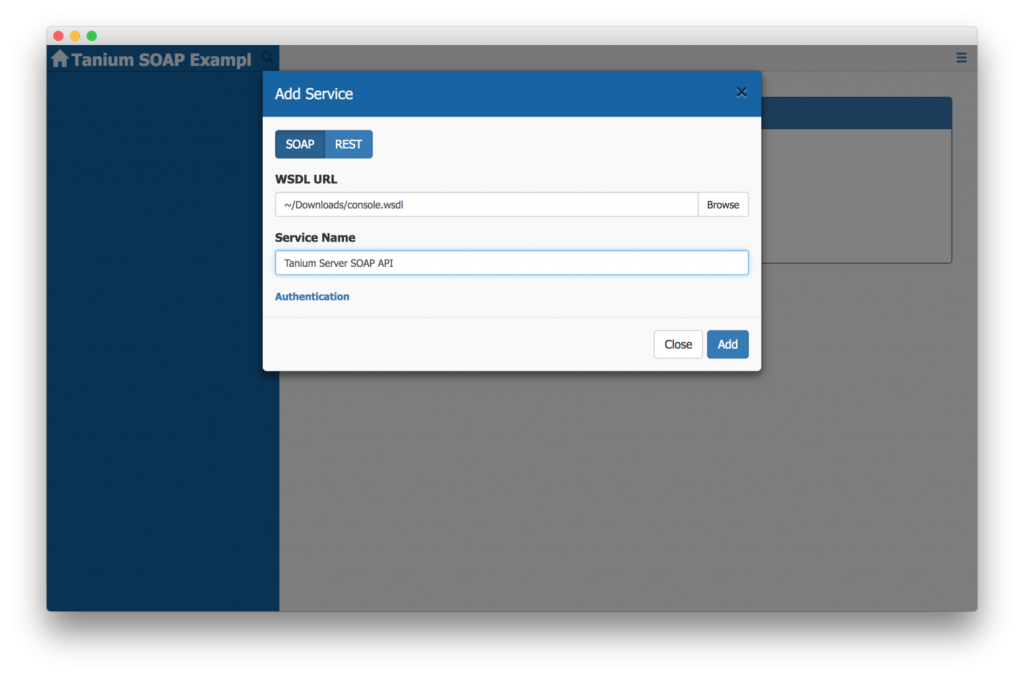
Step 2
CREATING YOUR FIRST REQUEST
Once you’ve got your SOAP service set up, the next step is to create a new request.
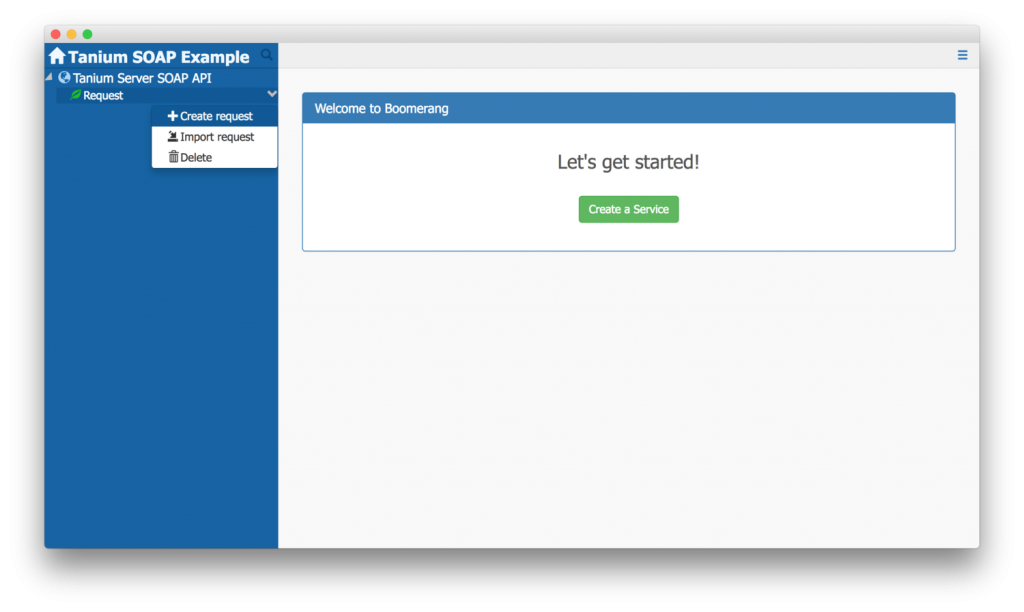
Step 3: After creating a SOAP project, create a new request
Boomerang (and most other tools like this) creates a request with a skeleton created from the WSDL file and actually gives a pretty extensive template for what the request can look like.
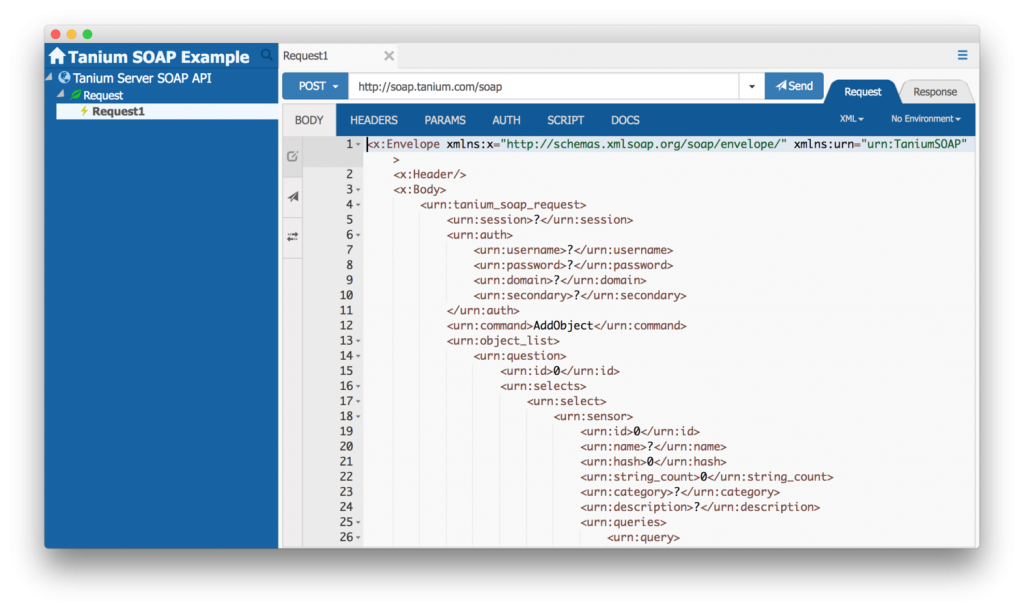
Tanium Serve SOAP API Request Template
Unfortunately, the Tanium Server’s API WSDL is fairly broad and is a bit too much (at least for me). A few years back when I was learning the API, I would keep the console.wsdl open in a text file (or XML-friendly viewer) so that I could review what each of the elements in question were. In most of the API calls you will make, there are three primary elements that you need: “auth”, “command”, and “object_list”. And since the rest is usually unnecessary, just delete it all so that it looks like below. You’ll notice I’ve added “system_status” to the “object_list” — more on that below.
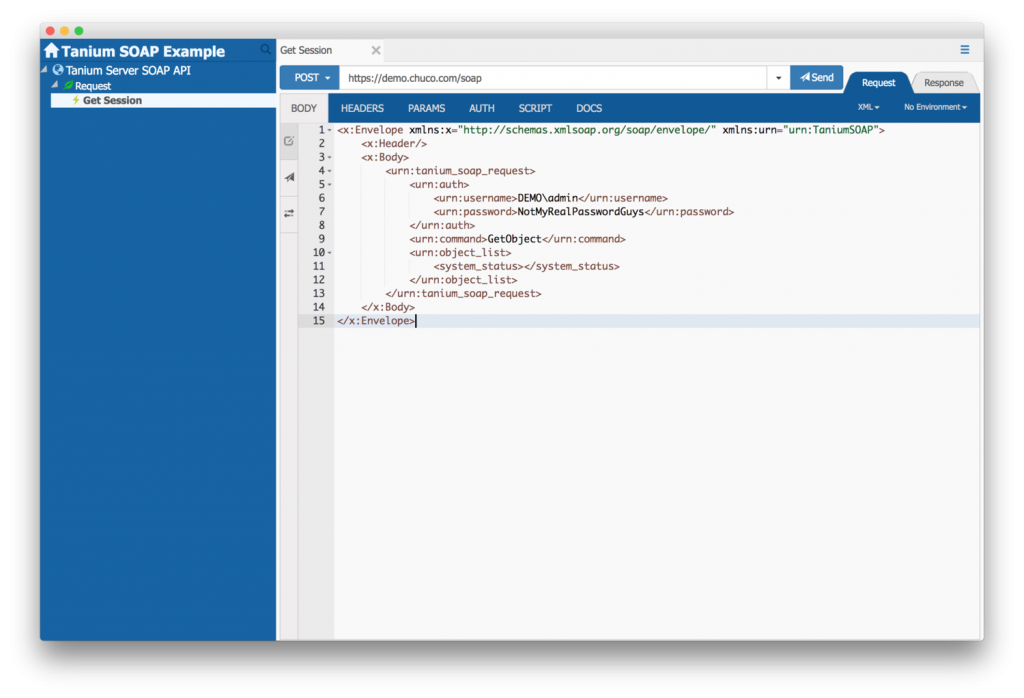
Basic Tanium SOAP request with username and password
HOW TO AUTHENTICATE
Back in the day, you had to actually pull a session ID out of the “tanium” database and use that in a <session> element. But since that was tremendously unsafe, Tanium moved to an auth model where you actually needed to provide a userid and password. Initially, this sounds just as unsafe as a session ID, but its almost like a necessary evil. Once you authenticate and continue using the API at a good frequency, you can move to utilizing the session ID that is put in the response back to your first API call. In other words, you can stop using your userid and password and just use this temporal session ID.
In order to authenticate, all you need to do is fill out the “auth” element. The easiest thing to do at this point is to delete “domain” and “secondary” and fill out “username” and “password” just as you would the Tanium Console). Once you’ve successfully made a request to the Tanium Server API, it will actually pass back a session ID. Once you’ve got this, you can just use the “session_id” element instead of the “userid” and “password” elements.
Unfortunately, you need to specify a “command”, so what I typically do is specify “GetObject” as the command and add something like “system_status” to the “object_list” — more on this in a few paragraphs, just bare with me here.
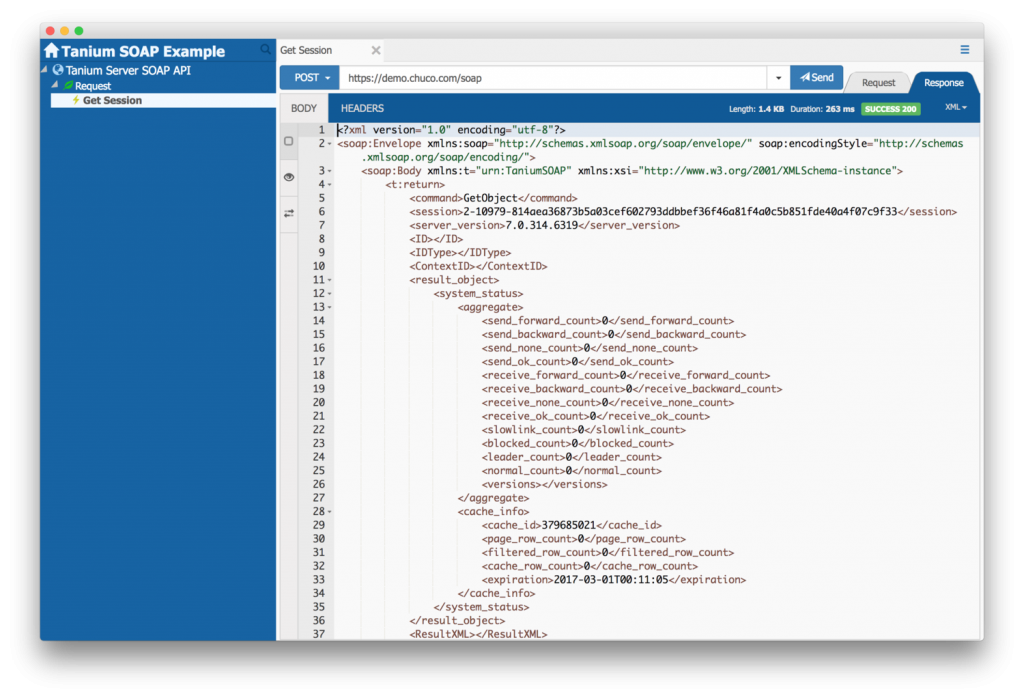
Soap response with new session ID and "system_status" data
At this point, you’ve executed a basic SOAP request, and have successfully used the Tanium Server SOAP API! But, since you probably have no idea what system statuses are (or maybe you do, and you can stop here), lets do one more example that you will probably understand easier.
HOW TO READ A SENSOR
Once you have the session ID, use that to create the next request. Keep in mind that if you don’t use the session ID quickly enough, it will expire. Also keep in mind that you may get back a new session ID in a future response that you should use instead to keep the session going.
Lets try to get the definition of a Tanium Sensor. And, lets also avoid using the previous username/password method we did above. First, lets use the new session ID by adding the “session” element directly under “tanium_soap_request” (you might think it should go under the previous “auth” element, but it doesn’t). Second, under “object_list”, lets change “system_status” to “sensor”, and look for the Sensor by name (you can also look by ID or hash, but name is easiest at this point).
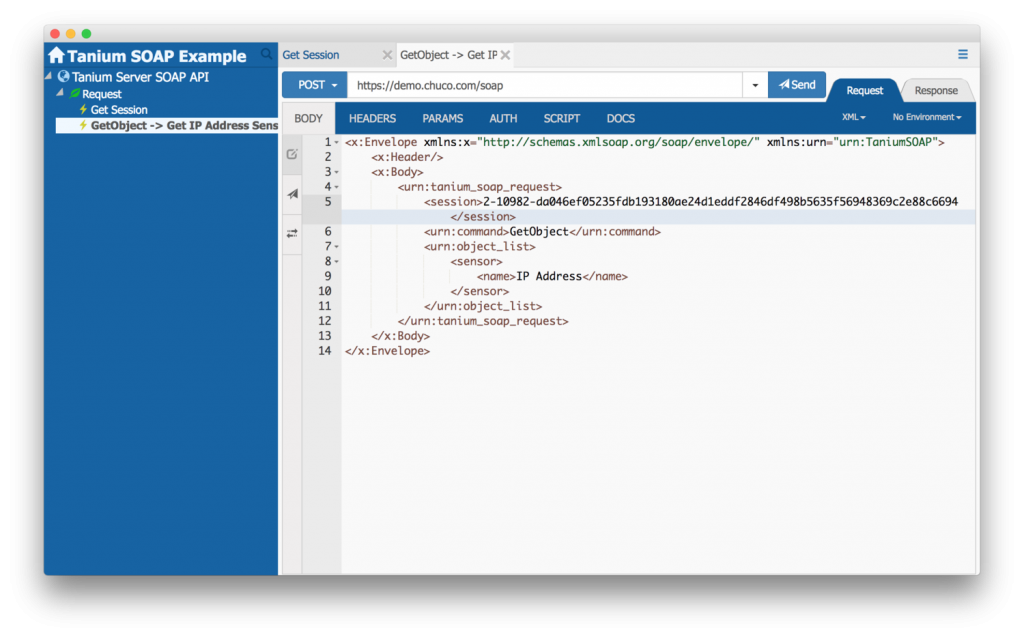
Adding a new session ID to a request
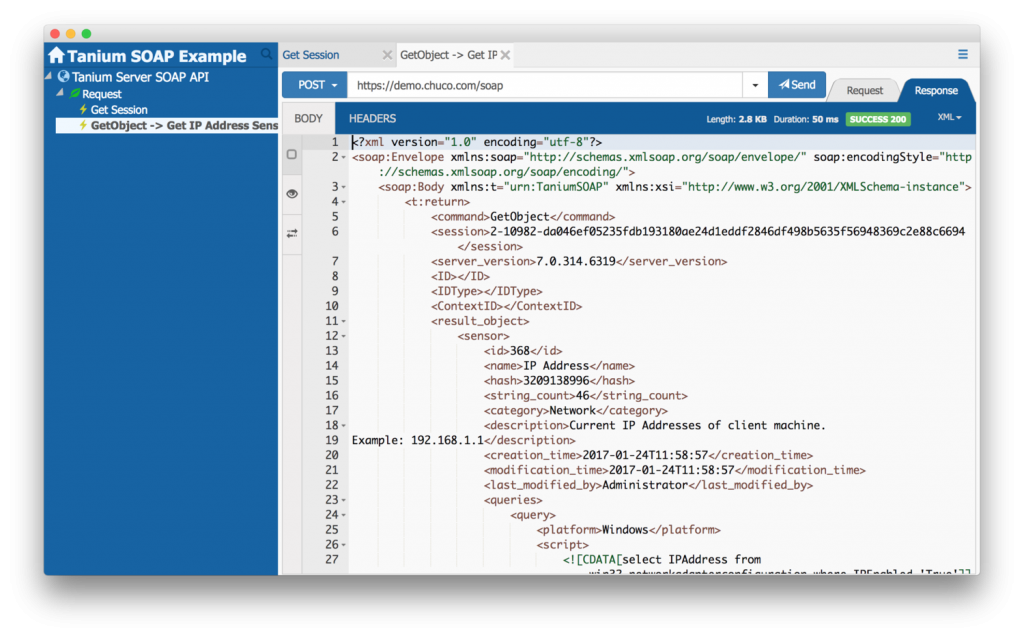
What you’ll see in the response is the full definition of the Sensor named IP Address (an obvious fan favorite of Tanium operators everywhere). You get the full slew of data including ID, hash, category, and more.
Adding a new session ID to a request
ADDITIONAL CAPABILITIES
There’s obviously a lot more you can do with the SOAP API. For now, take a look at the WSDL definition if you want to play around with more commands and objects. Keep in mind to use a development environment! I can’t tell you how many times experienced operators have accidentally done something stupid to a production environment because they thought they really knew what they were doing.
Really useful API calls include creating questions and getting responses, executing actions, and getting information about the Tanium Server itself. If you wait a week or two, I’ll have more posts that describe these, as well as parallel posts that include how to accomplish these tasks with the Pytan Python wrapper.