Deploying applications and module content can be challenging, especially when you need to work around 20 different change windows that depend on location, application, OS, system or server type (the list goes on). Here is an example of how you can use the Client Maintenance content in Tanium to help sift through all that without needing to issue an Action per maintenance window.
Maintenance window content is currently only available for Windows operating systems and can be a powerful means of simplifying how you target a wide range of servers with different change windows – with just a little upfront time spent on setup.
Note that this is different from maintenance schedules you may have set up in the Patch module for example, to deploy your Windows updates.
In the example below, I am going to leverage my “Windows Workstations” Action Group to set a basic, scheduled deployment of my desired maintenance window settings. As I am sure you are already aware, carefully crafted Action Groups are essential when using Tanium. If you haven’t done so already, now may be a good time to examine your current Action Groups as well as the Computer Groups that populate those Action Groups. You will also want to have an outlined maintenance window policy to work with. While this process can be used in an ad-hoc manner, it is neither recommended or suggested.
HOW TO SET UP MAINTENANCE AND REBOOT
Option 1 – Ask your Technical Account Manager (TAM) for the latest version of the “Maintenance and Reboot” content. Then import it into the Tanium Console by going to Authoring à Sensors or Packages à Import from XML
Option 2 – Import the content using Tanium Solutions Labs Content Import. Note that this option is not available on your production Tanium Server.
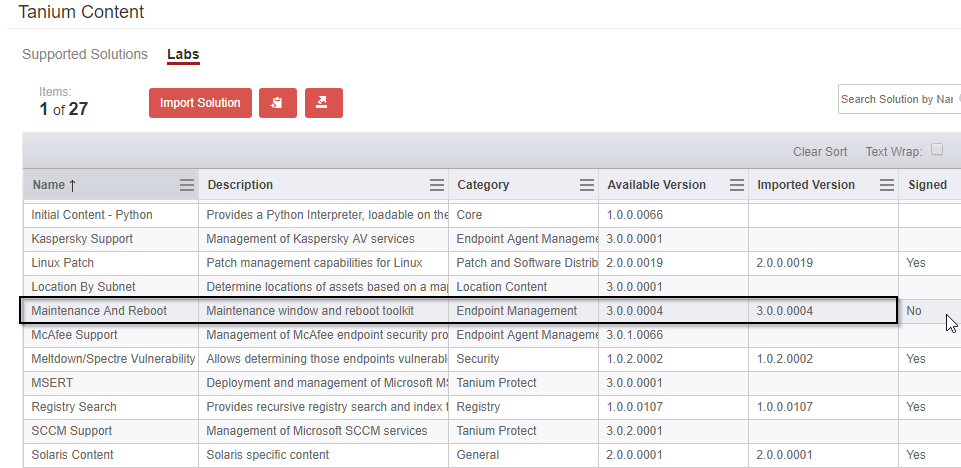
Figure 1 - Maintenance and Reboot Content import in Tanium Console
HOW TO DEPLOY A MAINTENANCE WINDOW
1. Start with a basic question to find our Windows Workstations without a configured or enabled maintenance window:
” Get Maintenance Window Enabled not contains yes from all machines with ( Is Windows contains true and Windows OS Type contains workstation and Maintenance Window Enabled not contains yes ) “
NOTE: Negative filtering is by and large not preferred, however, in this instance because Maintenance Window Enabled contains 3 states (yes, no, <not defined>) we want to capture all systems without an enabled Maintenance Window in as simple a question as possible.
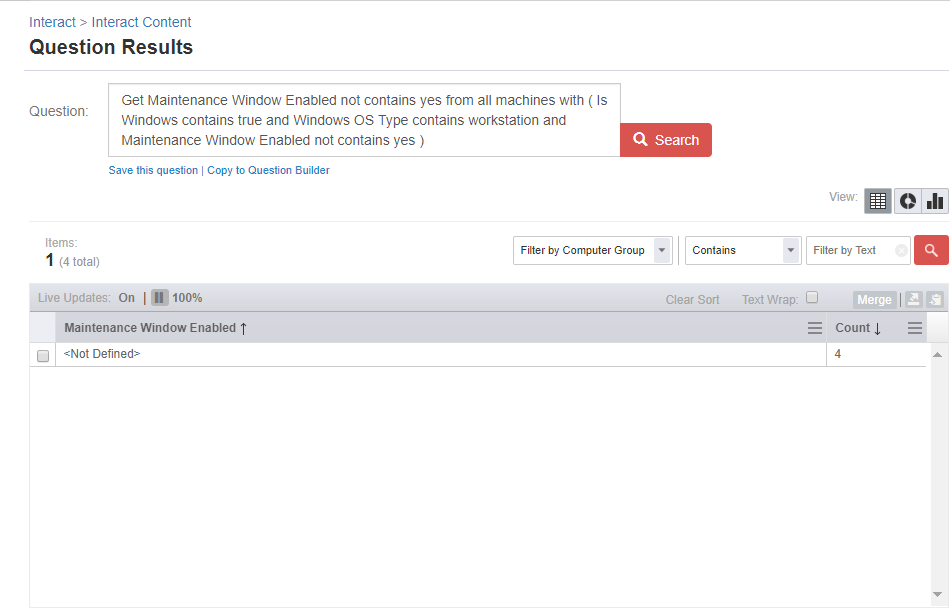
Figure 2 - Example output of starting question
With results returned containing what we want, we will now save this question to use as a means of quickly filtering endpoints for future deployments.
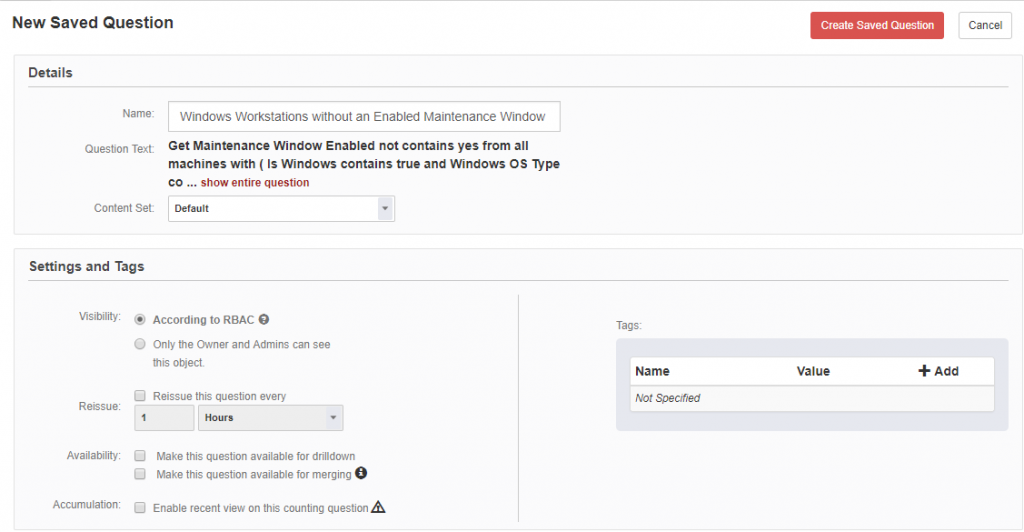
Figure 3 - Saved Question example
2. You can now ask your newly Saved Question and when you get your values returned, check “<Not Defined>” and/or “No” and – click “Deploy Action”
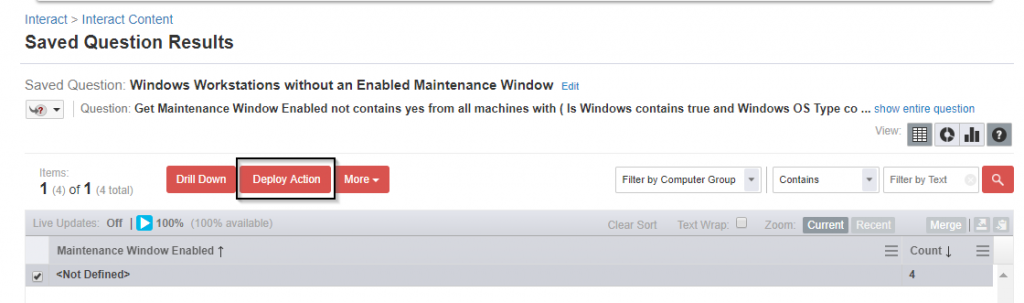
Figure 4 - Deploy Action example
The Action we are going to use to set the window is “Maintenance – Set Maintenance Window Parameters”
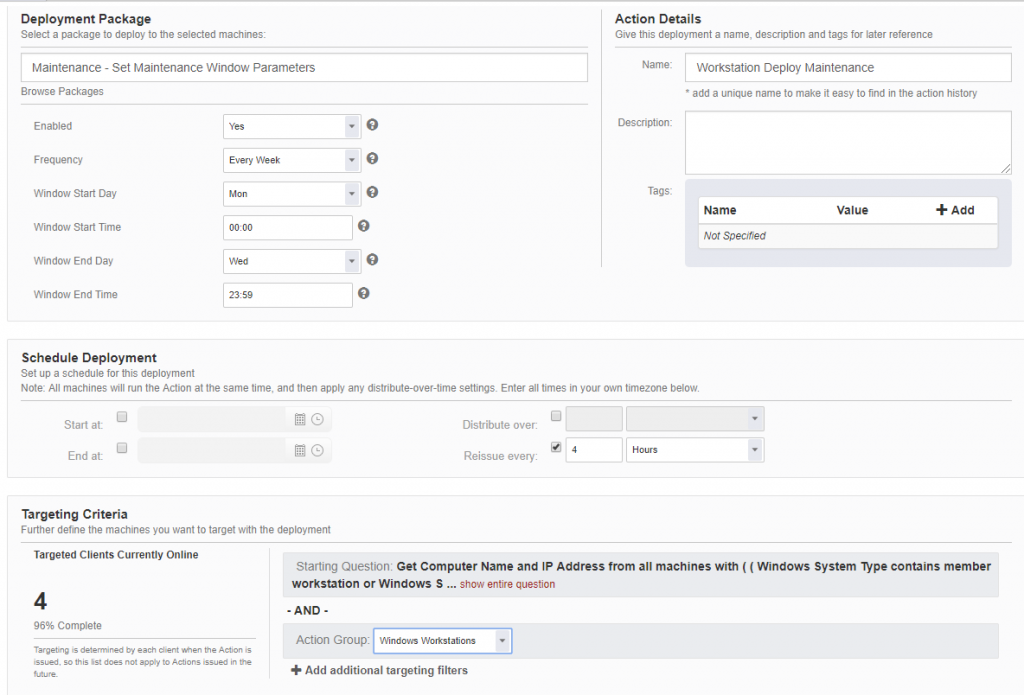
Figure 5 - Package Deployment example
For this example I used Monday – Wednesday since I am working with client systems. Most enterprises generally consist of laptops these days or have policies in place to shut down workstations over the weekend, so setting a weekend schedule doesn’t quite guarantee I will hit my intended audience. For your implementation just keep in mind “knowing your audience” is the key to this. Because this is completely customizable, you can set your servers to run Fri – Sun but only on even days, or the third week of every month and on and on.
Note that one limitation is you can’t schedule a maintenance window for more than a 3-day period. So, no M-F 8A-5P schedules for your users or servers. Beyond that, you are free to move about the cabin.
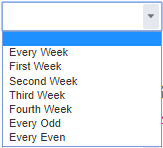
Figure 6 - Maintenance Window Scheduling Options
3. Now we can do 1 of 2 things. A single Package deployment to assign the window settings in a “one and done” type fashion, or like in the screenshot above, you can set it to reissue on an interval using the “Reissue Every” option. In my example, the Action of applying my maintenance window policy will check every 4 hours if there are more machines that matched the criteria we selected in the Saved Question. If it finds any new endpoints that meet the criteria, the Action will run on those endpoints. This prevents the need to continually check for machines with no maintenance configurations if no machines are found that fit the Action’s target criteria, no Action, is issued.
Click “Show preview to continue” and “Deploy Action” to complete the Action. If you created a recurring Action or set the start time in the future, you can review the Action by going to Scheduled Actions under Actions in the Tanium Console. If you set the Action to reissue, you’ll see a “Yes” under the Policy column.

Figure 7 - Verification of Policy and Interval applied to the Windows Workstations Action Group
LEVERAGE YOUR NEWLY ASSIGNED MAINTENANCE WINDOW FOR CONTENT DEPLOYMENT
Once you have configured some endpoints for maintenance windows, you can leverage – the “In Maintenance Window” sensor whenever you want to account for maintenance windows. The example below is deploying Tanium Trace.
First, ask a Question that outputs Trace Status and use the “In Maintenance Window” Sensor:

Figure 8 - Question and Save this question example
Second, save the Question in case you’d like to revisit:

Figure 9 - New Saved Question example
Then, select the output from “Tanium Trace Status” that you want to deploy to and click on the “Deploy Action” button.
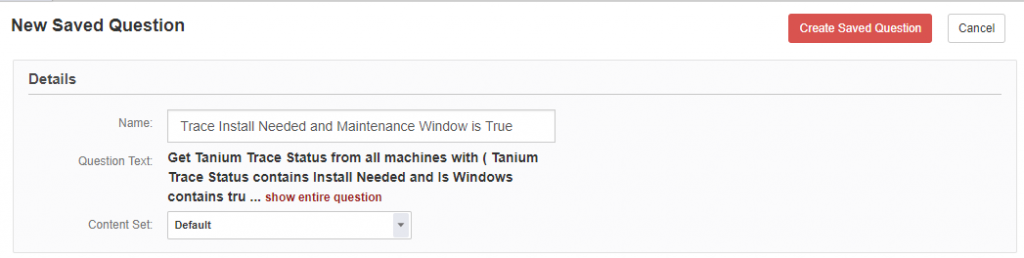
Figure 10 - Package Deployment example
CONCLUSION
For maintenance windowing to work in this workflow, you must reissue the Action at an interval that is smaller than your smallest maintenance window. In the example case where you have critical servers that have a maintenance window of 2 hours, we need this Trace Action to fire off frequently enough to catch our critical severs in their 2-hour window.
The above policy Action with 1-hour interval will look for systems needing the Trace Tools installed that are in their maintenance window. If the Action finds endpoints that meet the target criteria, the content will be distributed automatically to the systems. If there are no machines that meet the criteria (maybe there are no active maintenance windows, or Trace is fully deployed), then no Action is issued. Once this workflow has completed for our Trace deployment example, you can manage your complex maintenance windows moving forward, without having to alter any Scheduled Actions in Tanium.