Normally this kind of configuration for a Tanium product module should be fairly straightforward, but I ran into a bug I hadn’t seen before, and spun my wheels for awhile. So — I figured I’d document this in case anyone else needed it.
OS fingerprinting is one of the more interesting use cases for unmanaged assets (now known as Tanium Discover). But, the functionality is disabled by default because Discover’s OS fingerprinting relies on Nmap (this is common for other fingerprinting products as well).
HOW TO SET UP DISCOVER
When you import Tanium Discover and go to the workbench in the Tanium Console for the first time, you will need to do a couple of things prior to seeing unmanaged assets (btw – Tanium defines an unmanaged asset as something that doesn’t have the Tanium Client running on it).
1. First, you need to configure the background service account. This is insanely easy and almost not even worth mentioning. Just click on the gear icon in the upper right and supply a Tanium userid and password. The only thing you need to remember is this must be an Administrator-level Tanium account.
2. Second, you need to set up a discovery method. There are a few options that you can read more about in the Discover User Guide, but what we’ll look at now is the Nmap Scan Discovery option.
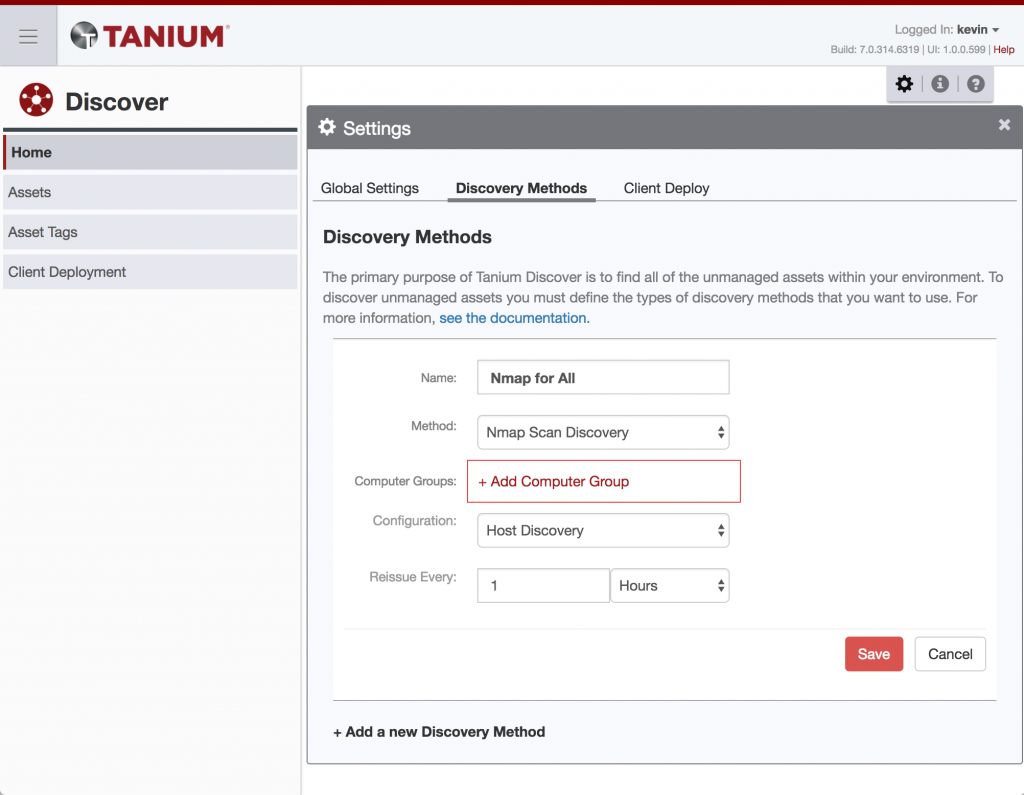
Nmap Scan Discovery Method in Tanium Discover
Be sure to think about which Computer Group you want to target. In production, you’ll want to be very careful which network segments you choose to initially test OS fingerprinting on. Nmap’s fingerprinting has unfortunately been known to take down fragile computer systems. For my own home lab, I am simply going with All Computers.
Go ahead and click Save. If you took at a look at the Configuration dropdown, you will notice that there is “Host Discovery” and “Host Discovery + OS Fingerprinting”. Clearly we will want the latter, but for testing purposes, lets leave out fingerprinting and make sure that the basic functionality is there.
Once saved, Tanium Discover should be in a functional state. However, you will need to wait for a few Scheduled Actions to fire off before you start seeing results.
3 (optional). If you are impatient like me, you can simply re-issue the Actions needed to get everything set up. In the Tanium Console, go to Menu -> Actions -> Scheduled Actions and filter all of the Scheduled Actions by the word “discover”
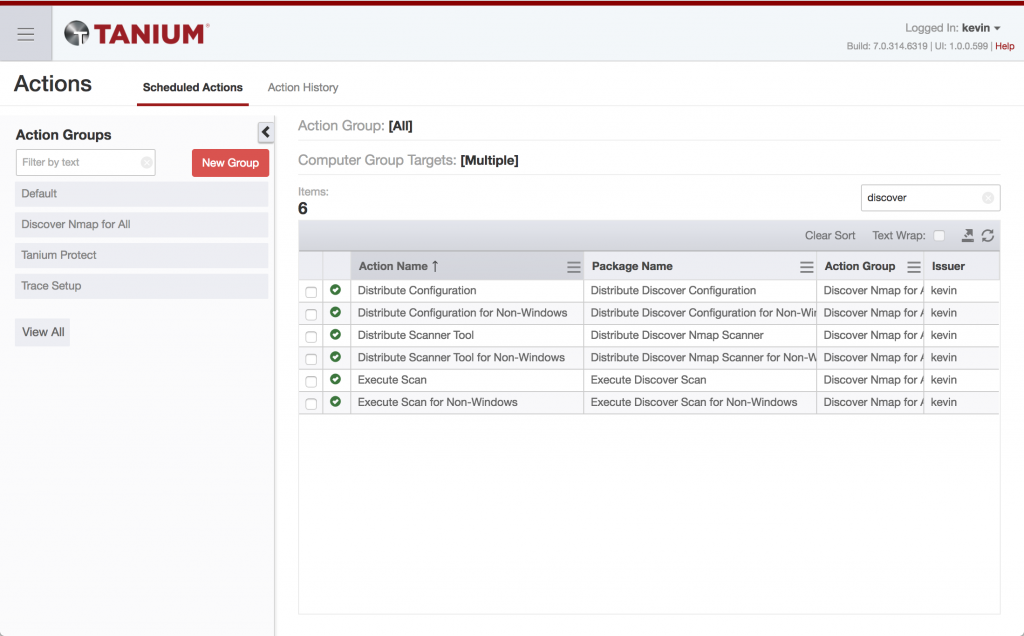
Discover Scheduled Actions for Nmap Discovery Method
You will notice that there are 3 steps involved to priming the system. You’ll see 6 because Tanium doesn’t support multi-OS commands in a single Action yet, so there are 3 for Windows and 3 for Linux distributions.
To avoid waiting an hour or two for the default Actions to kick in, you will need to re-issue the “Distribute Scanner Tool” Action, then the “Distribute Configuration” Action, and finally the “Execute Scan” Action. To be conservative, wait for each re-issued Action to complete to at least the majority of your environment before moving on to the next Action.
VERIFYING THAT DISCOVER IS WORKING
There are a couple of ways to see if Discover is working, but the simplest way is to just ask for Unmanaged Assets via Interact.
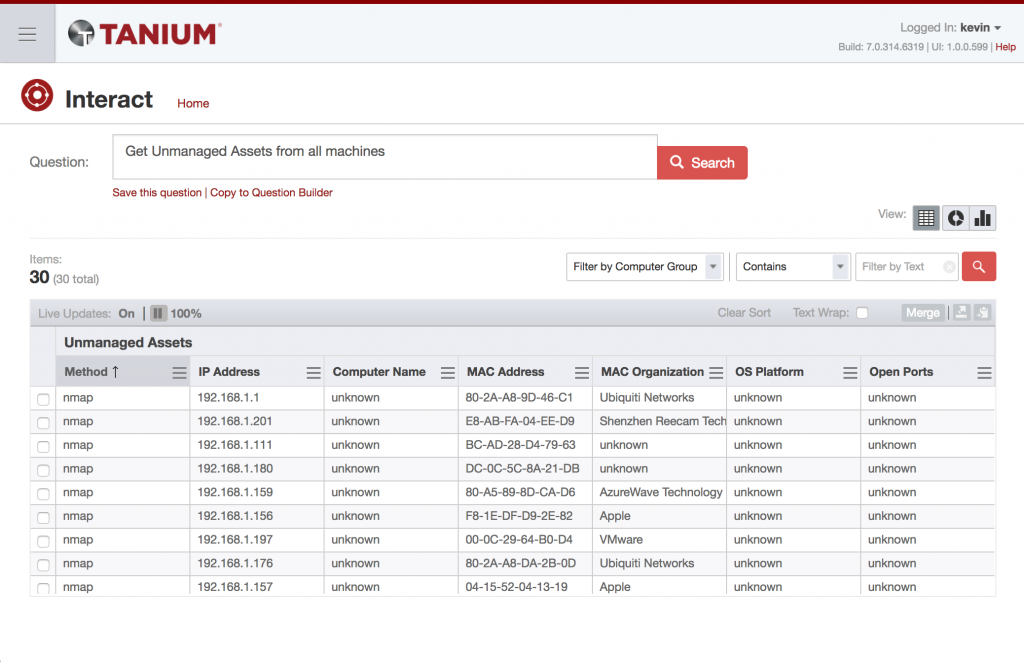
Get Unmanaged Assets from all machines
The Unmanaged Assets Sensor is what drives the data collection for Discover. You should also check out the various columns you can unhide too. The second method to check is to use Discover :). But — if you’re just setting it up, you may need to click on the “Discover Unmanaged Assets” in the upper right hand corner of the Discover Home tab.
ADDING OS FINGERPRINTING
After verifying that the basic Discover functionality was working, what I did was go back to the Discover configuration page, and simply changed the Nmap Scan Discovery Method from “Host Discovery” to “Host Discovery + OS Fingerprinting” (I mentioned this above).
You would expect that the configuration would then sync down to the endpoints within at least 45 minutes (what the default interval is for the Distribute Discover Configuration Scheduled Action). BUT — after nonchalantly waiting for an hour, nothing changed. I was still seeing “unknown” for OS Platform.
After a bit of digging, I noticed that the configuration file on the endpoint still had the fingerprinting capability disabled, so I re-issued the config distribution Action. I then noticed that the targeting of the Action only points at machines that don’t have a configuration file. What this means is, edits to configuration in Discover will simply not work. In my lab, I was able to go to my endpoints and manually delete the configuration file (a more patient Tanium purist would have used an Action) and get the configuration updated. After this, I finally got some OS fingerprinting!
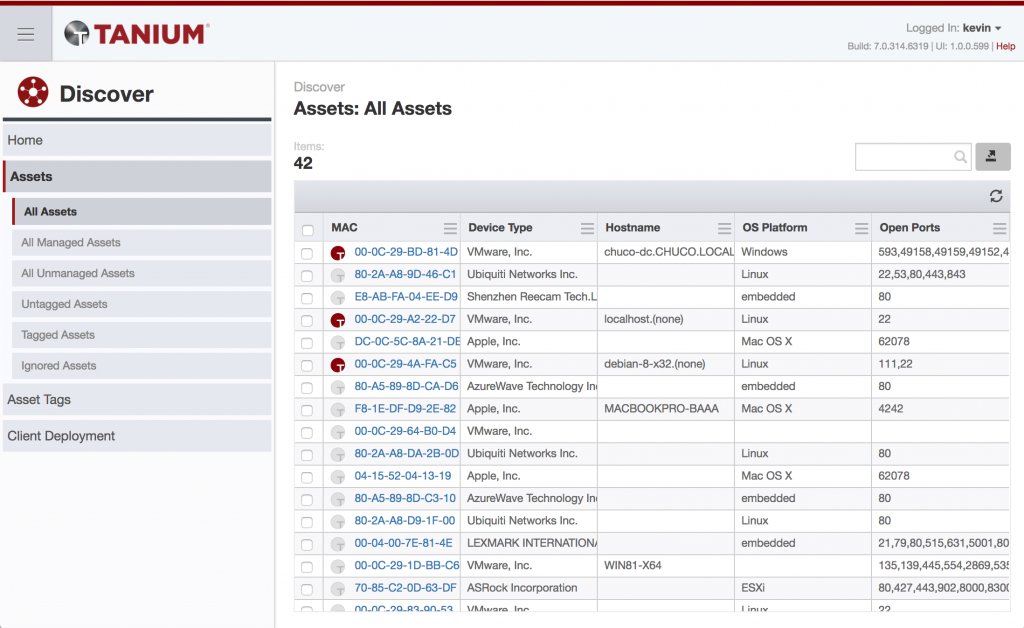
Discover Assets with OS Fingerprinting
But if you’re in production with a lot of endpoints, removing the configuration file isn’t practical since you’re not able to easily ensure that all of your machines get the Action, nor would you want to do this anyways for each time you want to change the configuration. So that leaves you with having to recreate your Discovery Method every time you want to make a change, until the engineering team fixes this issue.